Monday, 5 December 2016

CoP 3: More Practical Work

Continuing with smoke simulations I've tried to create a character element in the animation using the particles. I created this using 3d containers, fluid systems and nParticles in Maya, however I used the new Arnold renderer in maya to render out the animation but using this means that I can't batch render it without it leaving water marks on the screen. I avoided this by using the render sequence renderer in maya but I don't think that it rendered the full simulation because you can still see the particles flying through the scene.

In one way this shows how the particles work in the simulation and see what the particles are doing and how they react to one another in the simulation. 

For this simulation I'm using maya so the solver for this simulation is the FLIP solver, which is great at small to medium fluid simulations because particles are able to flow on top of each other without destabilizing and flying off every where.

For the character element in the simulation I wanted the particles to seem like they are trapped in box and they are trying it escape by crashing into the walls of the box. I wanted to create the feel like the particles were going to suffocate due to the smoke trail it leaves building up in the box. Doing this gives the audience some emotional connection to the particles because the audience worries about the particles.      


However I will be re-rendering this simulation out again using Mentalray so that it won't leave water marks, and so that it will render out fully and get more effect out of the simulation. Below is a frame of what a proper rendered out version should look like. (sorry that the image is a bit dark)


CoP 3: Emailing Practitioners

I've started emailing practitioners so that I can gather more primary research for my dissertation. To get the emails I had to research into different studios and find the vfx artist within the studios, doing this would give me a more reliable contact who would reply back to me and be able to answer the questions I asked. The questions I asked were, What software do you use while simulating particles? What solvers do you prefer to use for particle simulation? and how do you control the particles in a artistic way?

The studios/practitioners I contacted were;
-Blue Zoo's co founder Tom Box,
-Framestore's head of VFX Andy Hayes,
-Double Negative's Mark Ardington,
-a VFX supervisor at ILM Mike Mulholland,
-Effect artist Bruce Wright,
-CG Leader at The Mill Sih Harrington-Odedra,
-Oliver Winwood VFX Supervisor,
-Gavin Harrison Tech director at Double Negative,
-Thomas Slancik VFX generalist and design at methodstudio / lead houdini fx artist,  
-and finally VFX executive producer at Double Negative Melissa Taylor.

Out of all ten people I've contacted only one of them got back to me and that was Oliver Winwood, who got back to me via Linked In. The conversation started with me asking my questions to him, however he didn't reply straight away so I got a reply saying that he was busy and that he will try and get back to me as soon as possible. He finally got back to me saying this:

I replied by saying this:
hopefully I will continue speaking to Oliver and try and gather more information about his job and what he's worked on that may help my dissertation. However I feel like I won't hear back from him in a while because he's a very busy man and all the replies I've got from him have been two or three weeks apart. 

I've also got in contact with another practitioner called Stewart, who works at Dean Clough in Halifax. His job is in animation but he also works with Autodesk Maya so I thought that I could ask him a few questions to do with the software. I rang Stewart and he said that he would pass my questions on to other practitioners that would answer them better and in more detail than he could. I want to say this sounds good but I'm just worried that I won't hear anything back from Stewart or the other practitioners. 


CoP 3: Research Boards


Tuesday, 8 November 2016

CoP 3: Individual Tutorials - Discussion of Paper

In this tutorial we discussed the written side of the dissertation and my first bit of writing. I started off by writing my second chapter of my dissertation because I found that chapter to be the one where I had the most information and knowledge about. The chapter was about the different softwares people can use for particle simulations and the different plug-ins you can get, I also talked about the problems people could run into when simulating with particles.

The feedback that I got from it was mostly positive, which was great, but my tutor did say that I needed to have more primary research in the chapter, for example practitioners that I've gotten in contact with asking about particle simulation and what solvers they prefer and why. I also need to ask practitioners why they use a specific platform for their simulation and if they look for people for there studio who have a general knowledge about vfx or if they look for people who specialise in certain areas in vfx. My tutor also gave me advice into who I should contact like Framestore Andy Hayes, Tom Box at Blue Zoo, Mike Mulholland vfx supervisor at ILM, and Melissa Taylor vfx executive producer at Double Negative.

The other feedback that I got from my tutor was that at the end of chapter 2 I need to compare the softwares, there abilities and do an evaluational solution against each of the softwares. Doing this will also make the chapter more subjective rather that it being all factual. When I've done that I will start on chapter one and go into more depth about explaining different solvers within simulating particles.

CoP 3: Practical Development Part 2

After trying out a few liquid simulations I've now moved on to experimenting with smoke particles and see how I can manipulate them. For this I decided that instead of using Bifrost to simulate my smoke I wanted to see what else would allow me to do it with in Maya, so I used nParticles to create my simulation. I changed it up because I wanted to explore more into Maya and figure out what else it could do, so for this experiment I first created a 3D container from the fluid section of the FX tool bar doing this will create a very simple smoke trail than just floats upwards in the container. To make the smoke look more exciting I had to go through the attributes of the 3D container, which confusingly is called Fluid and within that Fluid there is a Fluid Emitter, and change some of the settings.

To make the simulation look like a sphere with a smoke trail being emitted behind it I had to change the density of the Fluid Emitter and make it thicker, I increased the heat of the fluid Emitter, and turned of the jitter attribute so that there was a smooth motion to the smoke. I then went into the fluid shape attribute and changed the base resolution of the container so that the smoke wasn't as pixelated (I think my final resolution was something like 300 pixels in the container), I then changed the dampening effect of the fluid shape very slightly by 0.015. Now moving on to the actual look of the smoke I changed the high density solver to all grids which sets all of the content method attributes on, after that I went into the content details and selected the density and changed the buoyancy to 0 and increased the dissipation to 0.35 just so it doesn't spread as mush. Moving on to the velocity I increased the swirl just a little bit to 0.3, I also added some turbulence to the smoke by increasing the strength to 1.4, the frequency to 0.6 which will make the smoke trail act more abstract and not just give it a straight trail. After that I just changed the colour to a yellowy brown colour.

Doing all of this made me add more of an artistic aesthetic look to the smoke, I wanted the smoke to look like it had some character to it so I made the smoke trail have turbulence to give off the emotion that it was scared/lose/unsure of where it is or want its doing there. I also animated the fluid emitter so that it had more character, I gave the smoke a quick motion to its movements to add to the emotion I gave it.

Analysing this I would like to create another simulation and tweak the attributes so that you can fully understand the movement of the smoke because I feel like the smoke trail has to much motion in it. However, I am very pleased with the outcome of the simulation due to the post production I did in after effects where I placed a background with a ramp and then added more atmospheric particles just to outline the empty space around the smoke.         

Monday, 31 October 2016

CoP 3: Practical Development

Carrying on with my practical side of CoP I have developed on liquid simulation by creating a waterfall to see how liquid will react with other liquid. Doing this I thought that I'd have to have two separate liquids and then make then colliders to each other, however when I tried this in Maya it wouldn't let a liquid be a collider as well. So to get around this I made two separate water emitter objects and then selected them both and created a liquid with in bifrost, this made it so that both liquids will be able to collide with one another.

Doing this experiment helped me figure out how liquid reacts upon collision with another liquid and its helped me experiment with different attributes within the liquid so that I can change the way the two liquid interact together. Below is my simulation show the effects of liquids colliding with one another.


To me this wasn't exactly what I wanted because I wanted the liquid to be thiner and quicker as it fell off the cliff rather than looking like gel. However, I will come back to this and figure out how to fix this problem, I feel like it has something to do with the gravity aspects within the simulation and also the amount of particles in the simulation. Another thing I've noticed looking back at this is that there is a watermark on the video, this is because I used Arnold renderer which needs a licence from 'Solid Angle' (a provider of rendering softwares) when rendering out. To fix this I will either have to buy a licence for Arnold renderer or use Maya's hardware 2.0 renderer to render out my simulations.   

Tuesday, 25 October 2016

CoP 3: Planning My Dissertation in Chapters

After having a discussion with my tutor where we came up with a structure for my dissertation I also found that I have tweaked my question so that it would suit my research more and give me more to develop on in my practical. This is what my dissertation structure looks like so far:

New Question* How to use particles in 3D software simulation to produce character for elemental effect?

Intro
Define what a particle is briefly
What am I going to be writing about?
700

Chapter 1
Define what a particle is
History of digital particle within the vfx industry
Significant world first
2500

Chapter 2
Pipeline
What software are people using
Plug inns
What issues?
700/1000

Chapter 3
Case study of water simulation in films
Another on smoke / fire simulations in films
Quotes from practitioners
2500

Chapter 4
My practical written up
What I have learnt
Simulation with a bit more character and story
1000/1500

Chapter 5
Conclusion 
500

7900/8700 words
  

CoP 3: Project Proposal


What is your Working Title for your Project?
To what extent does technological developments in production impact on animation?
Concisely, what are you planning on creating practically as a response to this proposal?
Possibly a series of environments rendered out differently using different textures and shaders to see how technology can change the aesthetics of a scene.
What was your subject research and practical output at Level 5?
Can 3D animation escape the Uncanny Valley theory?
I created two animations using motion capture and keyframe to see if the uncanny valley affects performance
What research needs to be undertaken into the general and specific contexts of your practice?
I will need to research into different rendering softwares so that I can get a good understanding of how it works and how different rendering techniques can change the look of the scene.
I'll also needs to research into different studios and see how their technology helps them produce the animations they create.
MAF will be a great opportunity for me to speak to practitioners about their studio and what softwares they use, and how that piece of software helps them create their projects.
I will be researching into Maya 2017 and finding out how the bifrost, boss, and fluid simulations work and how they've been improved over the past editions. This is to show how films have created and enhanced the look of their vfx.
To watch many tutorials on how to create these effects with in Maya.
What approaches will you take and what processes, methods, materials and tools are to be involved in research into your practice?
I'll be looking into different tutorials, about Maya, online of how to render and how to use different shaders, textures, and effects to achieve different outcomes for my environments.
What preparation or investigation do you need to undertake for your creative practice to take place?
I need to investigate into Maya 2017 and maybe different animation/vfx softwares to see how studios use it in their projects so that I can understand their methodology and effectively create environments similar to studio/film standards.
What research do you need to undertake regarding who your creativity is for?
my creativity is for beginner animators who want to go into the field of 3D/CGI animation, so the research I'll have to undertake is me experimenting within Maya 2017
also to see what other studios use and compare the outcomes of their animations/projects.
Perceived problems or difficulties
my computer might not have the specifications top run some of the softwares that I'll be using for my practical
Primary Source of Information - Description & Location - List at least 3
quotes from practitioners at MAF and ASFF
emailing studios asking what softwares they use and how technology has helped them develop their projects
Youtube Tutorials
Secondary Source of Information
List at least 10 ( in Havard Reference format )
Hayes, D. and Webster, C. (2013) Acting and performance for animation. Oxford: Taylor & Francis.
Kerlow, I.V.V. (2009) The art of 3-D: Computer animation and effects. 3rd edn. United Kingdom: John Wiley & Sons.
Lamarre, T. (2009) The anime machine: A media theory of animation. Minneapolis: University of Minnesota Press.
Monaco, J. (2008) How to read a film: Movies, media, and beyond. 30th edn. New York: Oxford University Press.
O’Connor, J. (2010) Mastering mental ray: Rendering techniques for 3D and CAD professionals. Indianapolis, IN: Wiley, John & Sons.
Krotoski, A. (2011) Storytelling: Digital technology allows us to tell tales in innovative new ways. Available at: https://www.theguardian.com/technology/2011/aug/07/digital-media-storytelling-internet (Accessed: 5 October 2016).
Murphy, S. (no date) How ‘life of pi’ became a visual masterpiece. Available at: http://mashable.com/2013/03/12/life-of-pi-technology/#.SWTQqg9taqZ (Accessed: 5 October 2016).
TheAloomaX (2014) VFX: Going behind the magic, episode 1: ILM creating the impossible. Available at: https://www.youtube.com/watch?v=eDoVcGPw_3o (Accessed: 9 October 2016).
Jeff Aberle (2016) Maya 2017 Bifrost rendering water and foam Tutorial. Available at: https://www.youtube.com/watch?v=5Drhfp4qLZc (Accessed: 5 October 2016).
Jeff Aberle (2016) Maya 2017 Bifrost Tutorial breaking waves. Available at: https://www.youtube.com/watch?v=OThS0plEv0A (Accessed: 5 October 2016).
TheAloomaX (2015) Visual effects: Going behind the magic - LIFE AFTER PI (official VFX documentary). Available at: https://www.youtube.com/watch?v=TgSPys9PatU&list=WL&index=19 (Accessed: 9 October 2016).

CoP 3: Triangulating My Research

In my dissertation I am asking 'To what extent does technological development in production impact on animation?', but I'm also addressing the use of particles in 3D software simulation that produce character for elemental effect. The reason for this is because I have an interest in visual effects and particle simulations and how they developed over the years and what technological advancements have been created to produce effective visual effects and simulations. Throughout my research I have come across multiple papers, practitioners, and studios that create particle simulations using different softwares and techniques. Here are some different ways in which technological developments in production have impacted on animation.  

Devon Penny and Nafees Bin Zafar, authors of 'Rapid: An Artist Friendly Particle System' state that "a particle system is a heavily used tool in every effects animation department in the world.", and that they have developed a new system that would allow easier use of particles, while allowing them to leverage existing procedural point manipulation tools to control simulations. (Penny.D, Bin Zafar. N, 2015) They called this new system 'Rapid'.  They've created this so that other artists would be able to create quick simulations and complex effects using Rapid.
Other practitioners have also come up with new ways of speeding up the production process using different technological developments they have created. Muller.M, Charyapr.D, and Gross.M have developed a particle-based method for interactive fluid simulation and rendering. Their thesis is based on smoothed particle hydrodynamics and uses special purpose kernels to increase stability and speed. The results are not as photo-realistic yet as animations computed off line. However, give that the simulation runs at interactive rates instead of taking minuets or hours per frame as in today's off line methods. ( Muller.M, Charyapr.D, and Gross.M, 2003).
There are two systems in which particle simulations are used the most and they are Bifrost in Maya and RealFlow in Hybrido. They are both very powerful FLIP solvers, realflow has been considered to be the industry standard for dynamics, however Bifrost is a recent integration tool added into Maya and it can now create large scale fluid dynamics. The differences between them is that in Maya, Bifrost has some fields like gravity built in so you don't need to do anything extra to get them applies to your particles. However, other nodes will need to be added like colliders or killplanes. Where as with Hybrido, RealFlows relationship editor, when you connect nodes together RealFlow automatically works out what the connections are. So if you have a daemon connected to a Hybrido domain, it makes the particles be affected by the daemon force. This makes it a nice workflow and once you get use to it, becomes one less thing to remember. Another thing different about these two systems is the actual simulation itself, in Maya it doesn't cache any of your simulation automatically, instead it caches it to a scratch location, which means if you close your project and then reopen it the simulation will not have been saved and you'd have to resimulate. On the other hand, in RealFlow, whenever you simulate it will automatically export the thing in your scene to your disk under your RealFlow project. (LeFabvre, D. 2015)    


CoP 3: My Reading That Reflects My Practical

I have already found a few readings which reflects on my practical, where I research into particle simulation, and I've come across multiple papers on water simulations speaking about how they have effectively used particles to create a realistic and believable simulation.

Some pieces of reading that has influenced me are as followed:

Muller. M, Charypar. D, Gross. M 'Particle-Based Fluid Simulation for Interactive Applications'
V. Kerlow. I 'The Art of 3D Computer Animation and Effects'

In Muller. M, Charypar. D, Gross. M's  'Particle-Based Fluid Simulation for Interactive Applications' the paper talks about how they have proposed an interactive method based on smoothing particle hydrodynamics (SPH) to simulate fluids with free surface. This meas that they will be experimenting with real time fluid simulation and improving it by using point splatting and marching cubes-based surface reconstruction, which is fast enough to be used in interactive systems and to allow for user interaction with models consisting of up to 5000 particles. They're doing this because typically fluid is simulated off-line and then visualized in a second step, which makes it harder to control the fluids behavior. This relates to my practice because I am experimenting with ways in which I can create character for elemental effect, so that processes they have used and produced can help further develop and increase the amount of time I can spend on each experiment. This is because in their results the simulation runs at interactive rates instead of taking minuets or hours per frame as in today's off-line methods.  

In Isaac V. Kerlow's book 'The Art of 3D Animation and Effects' it teaches you in chapter 12 all about Motion Dynamics and within this there is a section about Particle Systems, which tells you what a particle is and how it can be used. "Particle systems are used to represent dynamic objects that have irregular and complex shapes, each with its own behavior. Particles have a life snap during which they are created, behave a certain way, age, and die. Particles can also be used to control the motion of three-dimensional models - such as snow, water, or even a flock of birds..". This as help me understand what a particle is and what I can do with it with in my practical element. "Modeling with particle systems is based on employing simple shapes, usually small spheres or points in three-dimensional space. These shapes, or particles, have growth attributes. When these attributes are simulated, the particles have a specific behaviors that result in specific particle trajectories." This has helped me figure out how to make objects into particles and control their behavior. Reading this book will also help me in the long run because it will also teach me how to composite my practical together and teach me what other things I can create with particles, i.e. fire, smoke, clowds, and snowstorms.


Sunday, 23 October 2016

CoP 3: Group Tutorials

In this group tutorial we went around the room and briefly explained what we were doing for are dissertations and how are practical was going to reflect on it. This was so that we as peers had a chance to bounce ideas off of each other and help us get an idea of where everyone else is at, it was also good that we could benefit from each others feedback as we are all as a group working on applied animation.

The feedback that I got given was that for my practical I had to experiment more with the look/aesthetic of the simulations I will be producing, try and experiment with hybrid animation so like 3D simulations on a 2D background, and also to narrow my practical down so that I'm focusing on particles and physic simulations. This was all good feedback for my practical side of the dissertation and it will help me explore more into how particles work within a simulation.

However, for the actual written side of the dissertation I feel like more needs to be done because the feedback the I got was that I need to read more papers about Maya/particles/simulations etc. I also got told to look into films/animations which have a disaster element to it because it would of used smoke/dust/particle simulations within the film. A thing that did interest me though was something that my tutor asked me during the tutorials and it was "is a simulation an animation?", this could be an interesting topic to talk about in my dissertation, because people might argue that simulations are all done by the computer just by placing in some numbers and equations.

Looking back at the feedback I think that me plan of action is to read some papers about particle simulation and also research into films and how they apply the effects onto their footage. I also want to research the history of visual effects and how far it has come/developed over the past couple of years.


CoP 3: Starting My Practical

 For my practice I decided that I wanted to research into Maya 2017 and see want was new about it and how the different features have changed. Mainly I wanted to look into the Bifrost aspect of Maya and experiment with particle simulations because this plays a huge part in film and animation and most people don't really notice the effects/simulations in the films, this could be because the the simulations look so realistic so it just blends into the background or that they just don't care as much about the animations/simulations.

I chose to do this because I wanted to increase my abilities within Maya and learn more about what the software can create/produce. This will also give me the knowledge for when I go into industry and help me understand how to experiment with aesthetics in 3D animations/films.

Within Maya I will be developing my abilities to create liquid simulations and particle effects, and I'll create short animations showing what particle simulations Maya can produce and the different techniques you can use which will change the aesthetic of the animation. Whilst doing this I will also explain how the effects are applied to films and animations by breaking down the different steps and showing you how it is placed together onto films and animations.

I've already started producing simulations. I started by researching into liquid simulations and watching tutorials online to show me how its done in Maya. I began by doing a short simple wave simulation just to get a feel of Bifrost within Maya, I created this using the Bifrost liquid and creating a Motion Field using the Boss ripple / wave generator so that I could get a realistic wave motion on the liquid. I also experimented with the different attributes of the liquid and experimented with the 'Master Voxel Size', which means the resolution of the liquid, this will let you increase and decrease the amount of particle that are in the liquid.        
I feel like I need to develop my understanding of Bifrost more and create a couple more simulations before I move on from liquid and start producing dust or different particle simulations. I also want to experiment with the aesthetics for the liquid.

Thursday, 13 October 2016

CoP 3: Methodologies and Critical Analysis

Methodology
This is a logical, systematic, and structured way of arganising a research project. It shows the evidence that you have reflected critically on various research methods and chosen which is most useful in your research, It's also unique to each project.

Richard explained that every research project needs to have a methodology, and that every research project will have some sort of methodology, even if it is still throughout, or you don't recognise it as such. He also stated that 'methodology' is a scientistic word, which intimidates connotations, but is actually pretty straightforward.

However, that main thing that Richard said was that we need to outline our methodology at the start of our dissertations, this is so the reader will understand the way, and how, you researched your project and how you are going to go about the dissertation.

Critical Analysis
Critical is from the Greek word 'Kreinein' meaning to separate or to choose. Critical is like a form of skepticism, reasoned thinking - stepping away and using evidence and logic to come to your conclusion.

In are dissertations Richard suggested that we look into where the author/artist/designer/photographer was situated to get a better understanding where they where coming from and knowing why they said the thing they said. We also need to consider different points of view and critique are own work and ask myself where am I am coming from?

Richard also told us to contexrtualise everything! and to consider how to write your argument i.e. how are you going to answer your questions? what are you going to say? have you got evidence to back up your research. As well we have use triangulation which uses alternative theories that come together in the same body of date.  

CoP 3 Individual Tutorial

On the 10th of October I had an individual CoP tutorial with my tutor Annabeth and we talked about my dissertation question and how I would be doing my research. Annabeth told me to stick the production side of animation and not the distribution because I'm more interested in it, and it will narrow my search a lot and help my practical relate more to my written work.

Looking at my questions it seemed that I'm interested in the 3D aspects of animation and the visual effects so I kind of changed what I was doing for my dissertation. I am know researching into the different effects the software Maya and to look into real time post production which to me makes more sense to do. It also means that I can improve my skills in Maya and for my practical I'll be able to create visually pleasing environments.

Annabeth has also told me to look at a journal called 'cinefex' which is all about the visual effects in films, research into a studio named 'Digital Domain', be a member of Suggraph.org which shares an interest in computer graphics and interactive techniques, and research and maybe invest in Vue for Maya a plug in that features scenic nature creation for 3D enthusiasts.

After speaking to my tutor I am now going to go to festivals like ASFF to see the ILM talk in York and Manchester Animation Festival. This is so that I can gather some primary research from the practitioners in the real world of animation and visual effects and so that I can get their opinion on the technological development within the production of animation and visual effects.

Wednesday, 12 October 2016

CoP 3 Lecture 1: Organising your Research

For the first lecture of the year, that was presented by Richard, he talked us through what we needed to do throughout CoP 3 and gave us some advice on how to plan our research for are dissertations. Richard started off by giving us an overview on what we need to do for this module, which included 400 hours work for 40 credits, a 6-9000 word dissertation and a practical to go along side, with 2.5 hours of support on the written element of the module. Are deadline is the 12th of January 2017 which is less than 15 weeks away but we have to submit a draft of are dissertations before christmas break.

Planning the Project
to help us plan are project we got told to write down all the questions we wanted to investigate, which for me that would be, To what extent does technological development in production and distribution impact on animation? Will technology distract from the storytelling on an animation? and How has technology developed over history?

We also got asked what is the purpose of the study? and is are question(s) researchable? and in my case I feel like the purpose of my study is to understand and explore into how technology is advancing and what we'll be able to do with it in the future, but also to show how technology is enhancing in a way that when we watch a film people are now finding it hard to determine whats reality and whats CG. I feel like my question is widely researchable so I believe I'll need to narrow my search down a lot to get plausible information about my subject.

Choosing an appropriate title 
An appropriate title must provide a thesis or an answerable assertion, we are able to use subtitles as well as are main title. I have yet to come up with an appropriate question but I feel like I need more research to be able to do so. Also the title must be no longer than 15-20 words.

Project Outline
Richard recommended that we create a timetable to help us through the CoP module so that we can put holidays, work, life into consideration. We need to think about timing and set some aside for reading, researching, and allocating time for each section of are dissertation. Richard also suggested to factor tutorials into are timetable so that we can set targets or milestones for each tutorial.

Literature Search
I need to be aware that reading takes more time than you think and how much can I actually read in 100 hours? I need to fine key pieces of text and then find time to read them, however, I've already started this and I've gathered some books and found bits of texts that I can quote in my dissertation. I've also started to critique some of the text and compared them to others.

Referencing
referencing is a big part in the dissertation because it provides evidence to your research and backs up your argument. Richard told us to start our bibliography now and build it up as we go along, this should include names, surnames, dates, places, and publisher i.e. Miles.R, (2016) 'Dissertation', LCA publishing.

Structure The Dissertation Into Chapters
A dissertation should be separated into chapters, each chapter could ideally evidence a different theoretical / methodological approach. Chapters should be different in focus and how does the chapters relate to the practical? For my dissertation I know I'm having a chapter about the history of technological development in production, and then another on the research into different practitioners using different technical methods to create similar outcomes in their projects. But I haven't full figured out how I'm going to structure my dissertation.


  • Introduction - clear outline of your chosen topic, should state the overarching research, and demonstrate your methodology behind your project    
  • Main Body 1 - includes the context, theme and a clear awareness of the key theoretical and contextual sources within your chosen topic. Also evidence that you've triangulated different sources to come to a independent conclusion.
  • Main Body 2 - a case study of practice which investigates and analysis two or more practitioners work.
  • Main Body 3 - this is a chapter where you will reflect on your own practice and compare it with your dissertation.
  • Conclusion - an extended paragraph summerising the findings in each chapter and evaluating the successes and shortcomings of your research project.    

Friday, 7 October 2016

CoP 3 Summer Research/Presentation

Over the summer I gathered together some research on my dissertation about how technology is enhancing and how 3D animation and the real world are becoming one in the film industry. I did this by watching and analysing films like the life of pi and the new jungle book and how the CGI has gotten better throughout the years.

Before we broke up for summer last year we were briefed on CoP 3 and had to deliver a presentation on the research we gathered over the summer.

The feedback that I got from the presentation was very helpful in that I got directed towards looking at different rendering softwares and engines because they are the ones that have enhanced the most over the years and they play a huge part in making any film/animation look amazing.

Looking at different rendering techniques will also help me in my practical work because I will be using 3D animation and hopefully creating different rendered scenes using different renderers and then comparing the outcome of the experiment.

I also got told to explore more into studios such as Blue Zoo and Laike because they both produce the same aesthetic look in their animations but they have been produced in different ways. I.E Blue Zoo have a show called 'Miffy' which is a completely CGI tv series but it looks like its stop motion, where as Laika make beautiful stop motion animatios. I'll also compare their different technical techniques they use to create these animations.

Some of my peers recommended that I explore into looking at the people who created the tv show 'South Park' because its created in maya but its a 2D animation. another one was Lego movie because thats completely CGI but the textures and aesthetic of the animation looks like its stop motion, it might also relate to the research I will be doing in rendering because of how the characters where made so that they'd look exactly like Lego figurines.  

I talked about comparing the films 'Life of Pi' and 'The Jungle Book' and how their VFXs has increased from one to the other. However, my tutor told me to look into the shaders/textures/lighting and again rendering because the animation hasn't really developed mush between them but the compositing and rendering has.


CoP 3 Planning and Timetabling

Following on from last year where I did 3D and researched into the 'Uncanny Valley', I will be continuing from this by researching into the development of technology and how far we've come over the past few years. I will be doing this mainly for my dissertation but I'd like to do something like this for my extended practice however I don't know what I'd like to do for that yet. For CoP I'd like to research into motion capture and how more companies are using it instead of keyframe animation, I'd also like to research into how rendering engines have enhanced dramatically over the years i.e. from the film aesthetic of 'Life of Pi' to the new 'Jungle Book'.      

For the beginning of this year I have decided that I will be more organised than the past two years because this year really does matter! So I will be doing this by planning out my year week by week and knowing what to do each day. I'm doing this by creating a calendar like plan for the two semesters I have left at university, I've also printed off the module overview for CoP so that I can keep on track with my work and not fall behind (hopefully).


I feel like this year will be an interesting one because I'll be able to work on what I want and start learning new skills in the field I would like to end up in at the end of this year. With my dissertation I feel like I need to do a hell of a lot of research and create multiple experimentations within different 3D softwares so that I can have a good enough starting point for my dissertation.

Wednesday, 27 April 2016

CoP 3 Proposal Form

https://issuu.com/jamesbeardsell/docs/cop_3_proposal_form/1?e=24089028/30000297

CoP Creative Response - Final Response

This is my final outcome of the two animations put in to one showing the differences between motion capture and keyframe animation and if the Uncanny Valley appears within that animations. This links to my essay because in my essay I talk about how films and animations are effected by the Uncanny Valley theory, and also how the theory can make us feel towards characters that unfortunately fall into the Uncanny Valley. It also links to my essay because my animation shows how motion capture can be used to capture realistic movements but without using a character that looks realistically human like using CGI, and in my essay I talk about how if an animator uses CGI looking humans they are more likely to fall into the Uncanny Valley but if the animator just uses motion capture for the performance they can be even more creative. The performance of a character is important so the animator also needs to be able to act and know how the human body moves.


I feel like my animation relates well to my written work and I enjoyed working with motion capture I feel like it is very useful to use if the animator is going for a realistic performance however keyframe animation allows the animator to act and exaggerate so much more. So they both have there advantages and disadvantages to animation. The one thing looking back at my creative work I would change is a part of the character which is his hand because I'm not a huge fan of how they look and I don't really think that they fit in well with the subject matter, I'd change the hand so that the character would have four or five fingers instead. I also feel like this relates well with my essay because they both involve motion capture and how it can effect the persons opinion and emotions to an animation using this software.       
 

CoP Creative Response - Putting Together and Editing in After Effacts

After finishing in Maya I then had to batch render the animations which renders the animation out as an image sequence, so then I have to import the image sequence into After Effects and make it in to a video. When I placed the image sequence in to After Effects I also added in some text explaining what the experiment is and ask the audience if they can see the Uncanny Valley theory in the animations. I also edited the image sequences as well by tweaking with some of the colours to try and make the lighting look the same in each animation.

With the lighting I added an effect called 'Brightness and Contrast' which allows me to tweak the lighting so that the colour will be some what similar to one another. Doing this lowers the chances of the audience being distracted by the light changing brightness in between animations and make them focus more on the actual animation itself.  

I also created some fade transitions in between each animations and the text so that it would not be a hard cut, also it's more pleasing to the viewer to watch. 


Whilst editing this I also thought about if I should add any audio to it and if it should have sound effects in it. I decided to add some music to it just so that it wouldn't be silent and it'll make it a little more interesting to watch, however the music to me was very hard to choose and I didn't really know what kind of genre of music or how to make the music fit into the animations. If I could have more time to choose the music I would be that just down to me having poor time management.  

CoP Creative Response - Creating One Last Thing

I had one last idea and that was to give each character a punching bag so that the characters aren't hitting the air and looking a bit strange doing so. I made the punching bag really simple and easy to animate because it's not the main priority to the experiment, I made it by a cylinder and a sphere in Maya and combining them together and then adding a bent handle to it so that it will bend when the character hits it. I then placed a simple texture on it making the top red, the pipe silver and the base black just so that it won't draw your eyes away from the characters.


At the end of each animation the punching bag gets thrown across the floor as like a finishing move and for a bit of exaggeration. the punching bag wasn't hard to animation but again it was all about the timing of when the bag needed to bend and then how much it needed secondary motion because if I didn't consider any of this the punching bag would look so out of place and it would ruin the animation. 

In the motion capture animation I had to keyframe the punching bag because I thought of this idea after I had done all the motion capture filming so I though it might just be easier if I keyframed it instead, plus I don't think it looks bad in the animation I like it, but if I what thought of this idea sooner I feel like the animation would of been better with a motion captured punching bag as well.

CoP Creative Responce - Tweaking Up in Maya

For this I wanted to add a couple of things to the scenes in Maya so the the characters aren't just in an empty space punching the air. In each scene I added a floor and two light and ambient light to just light up the area and then I added a spot light to highlight the character, plus I made the floor a bit reflective so that it looks like a proper wooden floor.

Mocap Character

Keyframed Character

Unfortunately I was unable to get the same lighting in both scenes because the motion captured character scene is so much larger than the keyframed character scene so that means the lighting will reflect differently on the characters and on the floor as well. I think another reason for this is because I couldn't position the characters, lights, cameras and floors in the same place in both scenes because they are in two completely different files and I can not copy and paste the attributes from one scene to the other. However, the scenes don't look that much different and you can still understand whats going on in each scene, plus they won't be playing at the same time so you won't really tell that much if the lighting has changed.  

You can probably also tell that in the images above one of the characters has no hair and the other one does, this is because I initially started off with the character having no hair and being bald. But I had the idea of giving the character a five o'clock shadow but on the top of his head, it turns out that this was harder than I thought it was going to be because when I added the shadow onto the head he just looked like a quails egg, so I gave him proper hair and I actually preferred it so now the character will have hair as well.      

CoP Creative Response - Keyframe Animation in Maya

Animating the keyframe character was harder that I expected because I had to make the movement look human like and try not to exaggerate the actions too much or else there would be no point in this experiment to see if the Uncanny Valley appears in the movement of a character rather than the look of a character. The whole process took me about a full day to complete, it was a bit stressful at times when the animation wasn't doing what I was wanting it to do and there was a lot of tweaking with the graph editor (this helps smooth out the animation and moves keyframes about) so that the animation looked smooth and not robotic. I think the most stressful and hardest thing I had to do while creating this animation was thinking about timing and placement because thats the key to any good and realistic performance.

This is just a playblast of the keyframed animation and not the real rendered out piece, this is just to show you how I animated the character and to show you the performance with the controllers on. I feel like the performance is good, however there are bits that stick out to me which I'd like to change, for instance the second punch the character makes is a bit slow and I feel like the timing is wrong on it, but it is hard for me to change the keyframes on it without changing all the others after it. The one thing I do like about this is the kick at the end because it look convincing enough and I got the inspiration to do that from the film 300, but it was hard to get the positing or the arms right and to go in time with the kick so that the arms look like they are helping give momentum to the kick. 

CoP Seminar - Planning and Structuring an Essay


In this seminar we got taught how to plan and structure are essays in a professional way, we also got taught how to use harvard referencing in are essays so that we don't playgoers anything by accident. This helped a lot because I wasn't a hundred percent sure on how to harvard reference but now I'm more confident in how I can product a good quality essay. Here are some notes that I took down in class.      

After are lesson had finished I thought it might of been a good idea to type up my notes so that when it comes to start writing my essay I will have a good idea of where to start and how I would go about writing it. However, my essay might stray away from the plan after doing more research into the Uncanny Valley theory and I might only be able to talk about one or two films what have become victim of this theory as well. I think I'll have about ten or twelve different sources in my essay to help me evidence my conversation throughout my essay.      


I feel like I will make some good points in my essay and I am feeling confident writing it up because I know how I'm going to go about structure and knowing what topics to talk about, the only thing I'm not to sure on is writing 3000 word because I'm not the best at writing and English so this will be had for me to do. 

CoP Creative Response - Recapturing My Performance

I had to recapture my performance because the first one that I captured was to still and would of made no significant contribution to the experiment of this creative response because the movements were to simple and boring and they had no life to them, which would lower the differences between the two animations and have an effect to the Uncanny Valley theory.

I reshot my performance at home using my own computer and a free trail of the software IPI and I went out and got two kinects to that I could capture my performance in a better environment. In my performance I acted out boxing and tried to put a lot of exaggeration to the performance and I also tried to put a lot more life in to it so that when it comes to doing the keyframe animation there will be a big difference to both there performances.

After I did my motion capture I added it again in to Maya and placed the data onto the character to see what the movements would look like and how the character would look performing and this is what the result was.  

I feel like this went better than before and that the performance has moulded itself well on to the character in Maya, however there are a few things I'd like to change which is the hand at the end shakes a bit which could be to some errors in the data capturing the performance of me. The other thing is I'd like to change some of the weights on the character because some bits of the body are sticking to the wrong bit and it show in the performance. Other than that I really like the outcome of the motion capture character and I would happily do this technique again for another animation.

CoP Creative Response - Rigging Character for Motion Capture

For this I had to go back a couple of stages in my character build so that the character does not have any controllers and a skeleton because in Maya you can apply a prebuilt skeleton to your character and then with that skeleton you can import the reference footage data from the motion capture and and place it on to the prebuilt skeleton, this then acts as the controller to the character. This is what I captured using the IPI software and the kinect cameras.

As you can see this is what it looks like when you import your motion capture data to the skeleton, your character imitates the reference skeleton. However, I did go back and reshoot my motion capture because I was not to pleased with the first outcome because I was only able to use one of the two kinect cameras at college because at the time they couldn't fine both cameras.  


This is what it looks like with the new motion capture footage data when applied onto the character. There are a couple of thing wrong with the character which are the polygon count in the character is to low for it to fully imitate the reference skeleton but this can be fixed. The hardest part of this process was attaching on the prebuilt skeleton to my character  because I had to rescale my character to the skeleton and then I had to position the skeleton to the right dimensions of my character and then I had to bind the skeleton to the character and hope that there were not problems with the character moving around. I had to do this a couple of times because it kept messing up or my computer crashed, but I did it in the end.      

CoP Creative Response - Character Building in Maya

Building my character was a hard task to do but with the help from my tutors previous tutorial videos on how to build and rig a character in maya it didn't take me that long to do, I'd say the whole thing took me about two days to do, a day for modelling and another day for rigging. The reference images I drew helped a lot however I had to make the arms up because in the reference image the arms were down by his side where as I needed them to be in a T pose.       


Rigging the character was straight forward I just followed my tutors previous tutorials to help me through it, the most hardest bit was painting the influences on the body for the controls because I kept having to redo bits that I'd already did. After rigging the character he moved fine and I was now able to animate my character.  

However, before I started animating the character I wanted to put the texture on it so I had to grab the UV texture editor and took a snapshot of is so that I could take it into Photoshop and add colour and texture. This below shows you what a UV texture map is and how I was going to colour him in.  

After applying the texture onto my character I am now ready to start animating, which shouldn't take too long to do hopefully, and as you can see I also added in a floor so that he's not just floating around. After animating this character I am then going to use it for my motion capture so that I'm not using multiple characters and making things even more complicated, plus it'll be easier to see my outcome better if I just use one character for the whole thing.
 

CoP Creative Response - Character Design

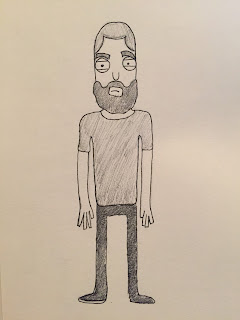
I didn't really look at any other character designs for inspiration for my character because I already kind of knew how my character was going to look. I wanted my character to look kind of comical and not really fit the fighting abilities the character will be performing. My character will be a man who is a bit over weight and who has a big bushy beard but also a bit bald, this has nothing to do with the theoretical side of the animation I'm just doing this because I wanted it to be amusing as well.


I actually took inspiration from one of my own characters that I created earlier for another module and then tweaked the character a bit by making him rounder, shorter and changing the clothes. I did this because I really liked this first character design and how in-proportionate he is to a humans body. I also did chose this character because of how simplistic the character is which will make it easier to build in Maya.  


For these characters I drew them out front ways and side ways and tried my best to make them the sam hight, so that I can import them in to Maya and use them for reference when I build my character. I haven't bothered colouring them in and doing final design sheets because I didn't think they would be necessary, plus I'm colouring the character in on photoshop so that I can use that for the 3D models texture but the colour will be on a unfolded net of the character.

I feel like the hardest part of modelling this character will be the face because of the beard and how I'm actually going to model that, I don't know if I'm going to model that separately or model it as part of the face itself.  
  

CoP Creative Response - Research into Human Movement

I researched into human movement and actions so that when it comes to me doing the keyframe animation I'll have references into what poses I can place my character in to. What I did was I gathered loads of images and references off of the internet and created a moodboard of different human poses and key boxing positions and where the weight is transferred between each punch.


I started off by looking at human movements and frame by frame layouts, I then moved onto looking at fight poses and how the body moves with the action of punching. I've got references from video games, life drawings, sketches, photographs and from the animated survival kit book, so that I can see how the human body changes is different forms of media and technique.

These reference images will also help me for when I come to do my motion capture because for one thing I'm not a boxer so I will have to figure out how to act like one, and two I will be able to look at these and find poses that will influence my in my performance while I'm boxing in front of the cameras.

This will help me figure out how to position my character, however these reference images will not influence me in my character designs because they are too life like for what I was wanting to do. My character will look more cartoonish but will act and move like a real human.  

CoP creative Response - Research Into Different Motion Capture Techniques

For my creative response I've researched into motion capture and the different techniques to which I can capture my performance and I have also researched into how the human body moves so that I can get the best quality performance out of the key framed animation.

There are many different ways in which I can capture my performance, these include using Optical Passive which uses retro reflective markers that are tracked by infrared cameras. Optical Active uses LED markers connected by wires to the motion capture suit. Video / Markerless does not require markers, instead relies on software to track the subjects' movement. And finally Inertrail is a technique that does not require cameras except as a localiser tool, Inertrail sensors are worn by the subject and the data is transferred wirelessly to the computer.

I feel that for my motion capture I will use the Markerless technique because for me it is the easiest to use and unfortunately the college aren't equipped with the industry standard equipment for motion capture. However, for what I'm wanting to do with the motion capture the Markerless technique will work perfectly well. For this technique I've been shown a software by one of my tutors called IPI, which uses two Kinect cameras pointed at a 45 degree angle towards the subject.

The software is a free download program provided by IPI soft LLC, for capturing, playing back and processing video recordings from multiple cameras and Beth sensors.
http://ipisoft.com

I feel like this will get me a good result of what I'm wanting to capture which is me performing as a boxer because I'm not moving my feet as much so I'll be in a stationary position.